Getting started with Isaac™ Sim
Getting started with Isaac™ Sim
NVIDIA® Isaac™ Sim is part of the NVIDIA® Omniverse platform; it is a high-fidelity, photorealistic simulator tailored to robotics simulation. This tutorial covers the essential steps needed to get started with Isaac™ Sim and the ZED. For a more in-depth tutorial, you can follow the official guides from NVIDIA®.
Build and install NVIDIA® Isaac™ Sim
Since version 5.0, the recommended way to install Isaac™ Sim is to build it from source using the official GitHub repository.
Make sure your workstation meets the System Requirements before proceeding.
Prerequisites
The ZED Isaac™ Sim extension shares the same requirements as Isaac™ Sim itself. Refer to the official Isaac™ Sim requirements page for the full list of hardware and software prerequisites.
Clone and build
Linux:
Windows:
Congrats! 🎉 You are now ready to start using Isaac™ Sim and the ZED Camera extension.
Launch Isaac™ Sim
Once Isaac™ Sim has been built in the previous step, you can run the application from a terminal:
Linux:
Windows:
Create your environment
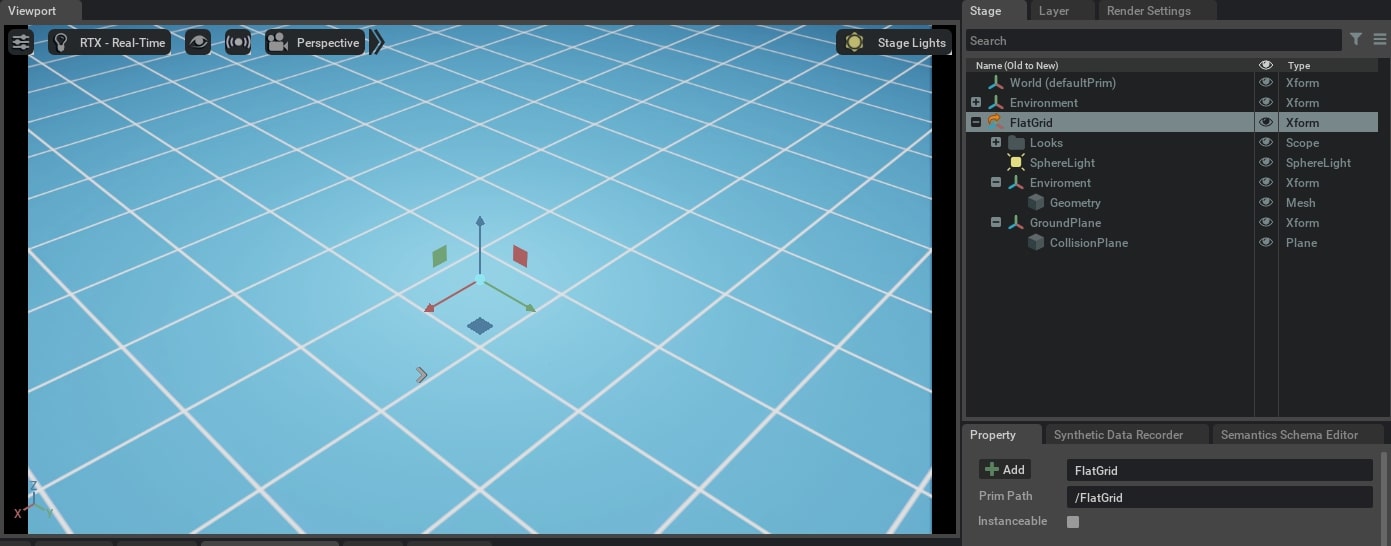
The environment in Isaac™ Sim consists of a Stage (panel to the right) that holds all of the assets in the USD scene. To have a working simulation with physics, you need to:
- Create a physics scene that allows you to create physics and gravity.
- Add a ground plane that prevents objects from falling infinitely.
A quick way to explore these things is to use a predefined environment by going to the top menu bar Create -> Isaac -> Environments and choosing the Flat grid as it is the simplest one.
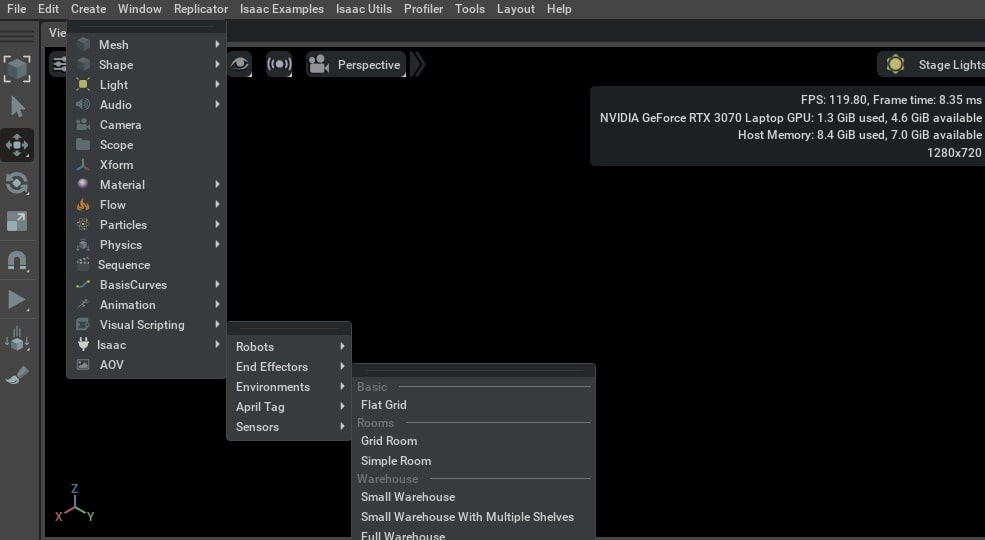
You will notice that the stage has been populated by items with different prims (Prim is short for primitive, the fundamental container object in Omniverse). The window that shows the flat grid is called the Viewport.
Add objects to the scene
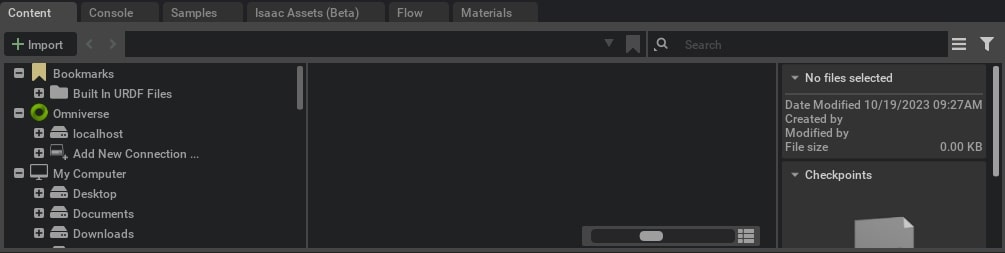
You can use the Content and Isaac Assets panels located at the bottom of the window to add prims to the stage.
The Content tab lets you look for files located on your machine while the Isaac Assets tab shows all of the available assets in Isaac™ Sim. To add an item simply drag it into your scene or the stage panel.
Create an Action graph
Action graphs are part of the Visual Scripting tools provided by Isaac™ Sim, allowing for programming using nodes instead of code. They are event-based and enable the user to execute actions based on a sequence of events and conditions.
To create an Action graph, right-click anywhere in the viewport and select Create -> Visual Scripting -> Action graph
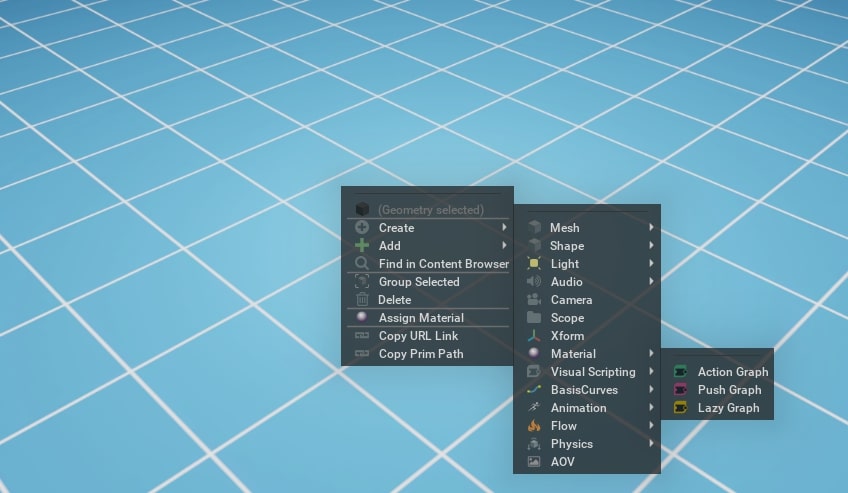
A new action graph appears in the Stage view, and the related Action Graph panel is now open at the bottom of the screen.
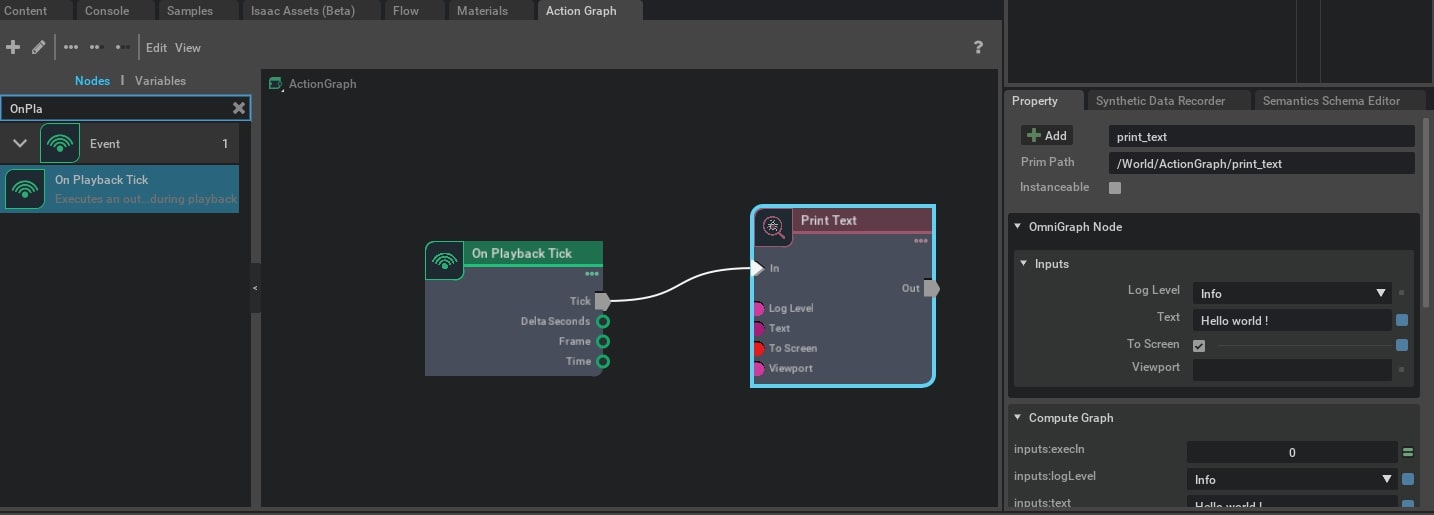
Start typing “OnPlaybackTick” in the search bar on the left side of the panel to find the node. Then drag and drop it into the graph. Do the same for the “Print Text” node.
Connect the Tick of the OnPlaybackTick to the In of the Print Text. Then click on the Print Text node and fill out its properties in the Property panel on the right.
You can experiment with different settings to print on the screen (viewport) or on the Console tab. To execute the graph, simply press play (to trigger a playback tick) and you should see the printed text.
For a detailed explanation of OmniGraph, Omniverse’s visual programming framework, refer to the official documentation, which shows you how to control a robot using action graphs.
Now that we have a solid grasp of Isaac™ Sim’s core concepts and interface, we are ready to configure a ZED camera within the Isaac™ Sim environment.