How to Use PyTorch with ZED
Introduction
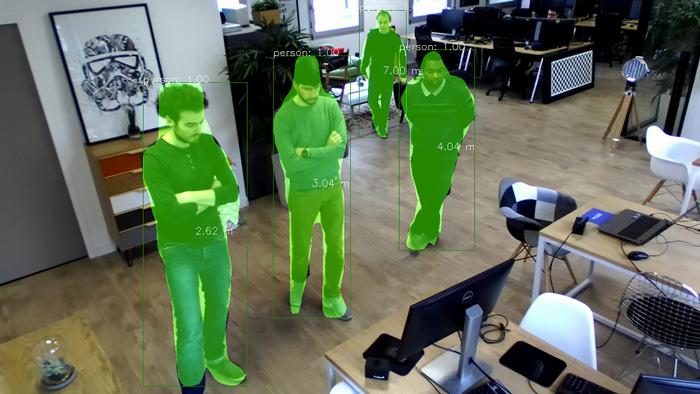
The ZED SDK can be interfaced with a PyTorch project to add 3D localization of objects detected with a custom neural network. In this tutorial, we will combine Mask R-CNN with the ZED SDK to detect, segment, classify and locate objects in 3D using a ZED stereo camera and PyTorch.
Installation
The Mask R-CNN 3D project depends on the following libraries:
- ZED SDK and Python API
- Pytorch (with cuDNN)
- OpenCV
- CUDA
- Python 3
- Apex
ZED SDK
Install the ZED SDK and Python API.
PyTorch Installation
Using Conda (recommended)
A dedicated environment can be created to set up PyTorch. Keep your environment activated while installing the following packages.
When installing PyTorch, the selected CUDA version must match the one used by the ZED SDK. Here, we use CUDA version 10.0.
Do not forget to install Python API inside your current environment.
Using Pip
For more information, please refer to the PyTorch setup page.
Apex Installation
We make use of NVIDIA’s Apex API. To install it, run the following:
Mask R-CNN Installation
Setup Mask R-CNN. If you’re using a conda environment, make sure it is still active before running the following commands.
Running Mask R-CNN 3D
Download the sample project code from GitHub. The next commands are launched from the sample directory.
Run the code with python3. You should be detecting objects captured by your ZED camera using the Mask R-CNN ResNet 50 model and localizing them in 3D.
Testing Other Models
Pre-trained models can be found in MODEL_ZOO.md. Selected models are downloaded automatically. Here we test Mask R-CNN with ResNet 101.
Now let’s test 3D key points extraction:
Other Options
You can launch object segmentation on recorded videos in SVO format using the following command:
Best accuracy can be obtained using min-image-size 800 (with reduced FPS).
To display heatmaps, use --show-mask-heatmaps.
Finally to run the model on the CPU, use MODEL.DEVICE cpu.